Ever tried to add a new category or tag in WordPress, only to be greeted by the frustrating “Could not insert term into the database WordPress” error? You’re not alone! This pesky issue can derail your content organization plans.
But fear not, solutions are within reach. In this post, we’ll walk you through the reasons behind this error and provide tried-and-true fixes to get you back on track.
Read: Samsung Galaxy S20 FE 5G Update: What’s New & Should You Download?
Why does this problem occur?
This problem can occur for various reasons. However, the main things you should keep in mind at first are:
- Is your site’s server space sufficient?
- Are you seeing this when typing in a language other than English?
- Are you using excessive tags or categories?
- Is the data limit of your database table set too low?
If any of the above is true for you, then this problem may occur. Now, we start our main topic discussion.
How to Solve “Could not insert term into the database WordPress” error?
First we will fix our error. Take a look at the image below-
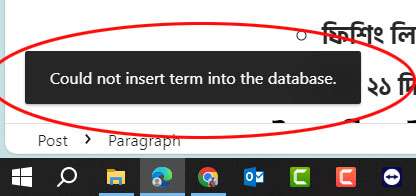
If this is the error you’re seeing, don’t worry! We have a 100% solution for you today. I myself suffered from this problem for about 2 months, so I’m happy to have finally found a solution. We will solve this problem in 5 steps. Let’s get started!
Step 01: First, log in to your site’s hosting panel. Today, we will see how to solve this problem using cPanel. Others can try their own methods.
Warning: If you don’t know much about databases, I request that you take the help of a developer. And before starting the work, be sure to back up your site and database.
TechPoth.com
After logging into the hosting server, click on the “phpMyAdmin” option in the database section.

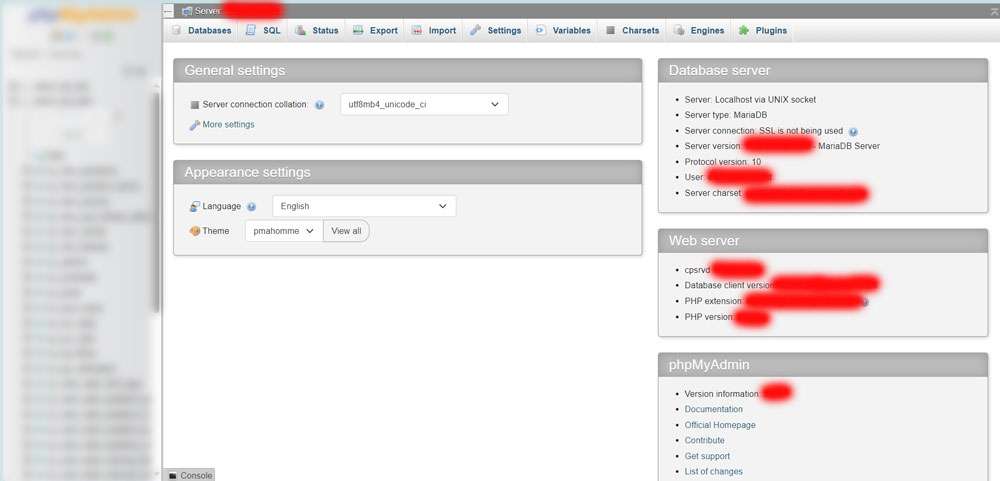
Step 02: After clicking, a database panel will open, as shown in the image below. Now, from the database list on the left, select the database of your site that is currently live. Be careful!
Step 03: Once your database is selected, now follow the image below and click on the “SQL” tab. Write the three-line code below. I have written it below for your convenience. Just copy and paste it. [Source of WordPress]
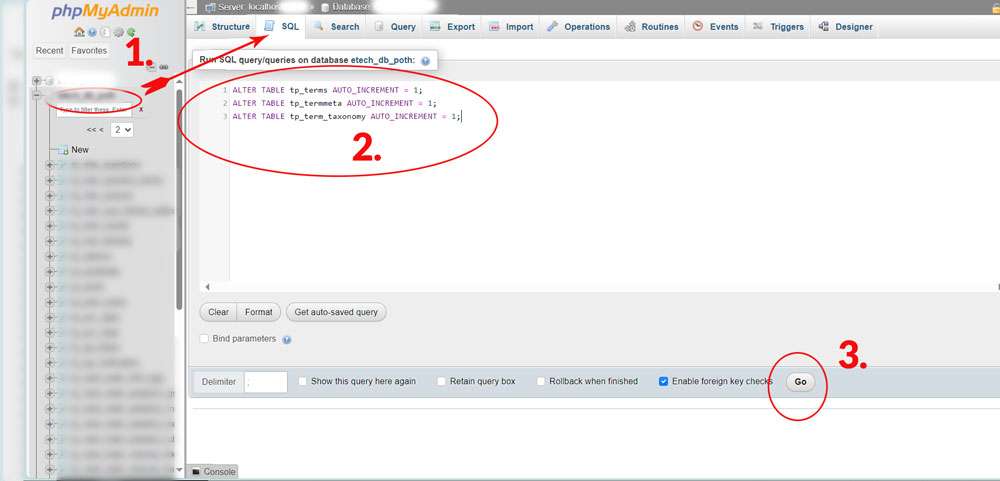
ALTER TABLE tp_terms AUTO_INCREMENT = 1;
ALTER TABLE tp_termmeta AUTO_INCREMENT = 1;
ALTER TABLE tp_term_taxonomy AUTO_INCREMENT = 1;
Once the code is copied, click the “GO” button in action 3 to execute the code. This code will change the default value of three tables from 0 to auto-increment number 1. Now, go back to your site and see if you can now create a new category or input a new tag.
And check the message “Could not insert term into the database wordpress” is showing again or not?
If the new input is successful, you don’t need to follow the next steps. Otherwise, go ahead for the next steps.
Step 04: If the problem persists, go back to “phpMyAdmin“ and select your database again and select the “wp_terms” table. If you change your database preset value then find with this.
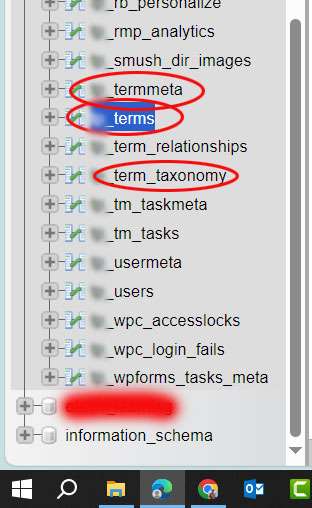
Now, we are going to directly increase a table’s data-type value now. The data in your table is frequently written in unicode format, which is difficult to read and takes up a lot of space when written in a language other than English. View the picture below –
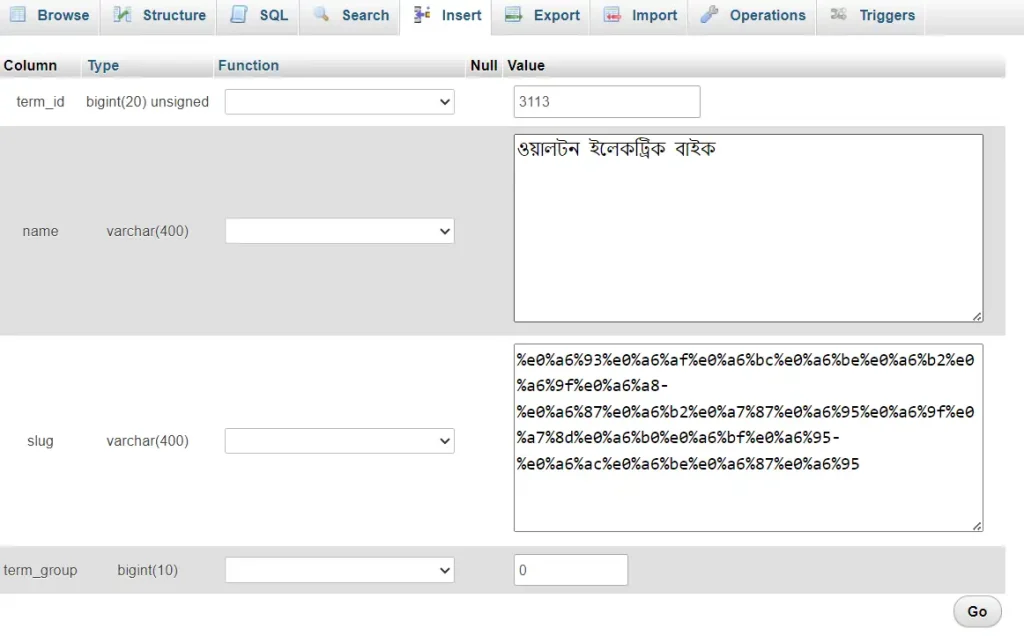
Step 05: In the “wp_terms” table, scroll down to the “name” and “slug” column. Click on the “Change” option under the “Action” column.
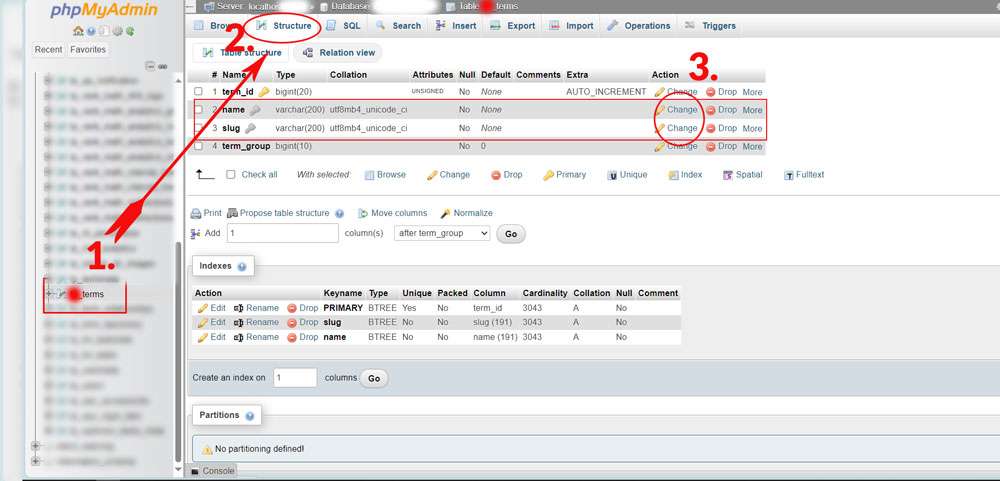
In the “Change” column, change the “Length/Values” value from ‘200’ to ‘400’. Finally, click on the “Save” button.

Check the below screen, after the updated.

Now, go back to your site and try again. You should now be able to create new categories and input new tags without any problems.
And don’t show any message or popup like “Could not insert term into the database WordPress”. If your problem does not solve yet, then please comment to me.
Happy coding and enjoy your site management. Thank you & Bye Bye!


